


If you don't know how to upload your own graphic file for printing your custom products, you've come to the right place.
In this short guide, we will explain all the steps necessary to attach a file to your order.
After choosing the items and completing the purchase process, your order will be confirmed.
At this point, just click on the file sending areanext to the username to access the orders that need personalized printing.
Once you reach the page you will find the order (in this case 5053) with the list of items that need a graphic file to be associated.
WARNING: if in the same order you have purchased a product without customization, it will not be shown in the list.
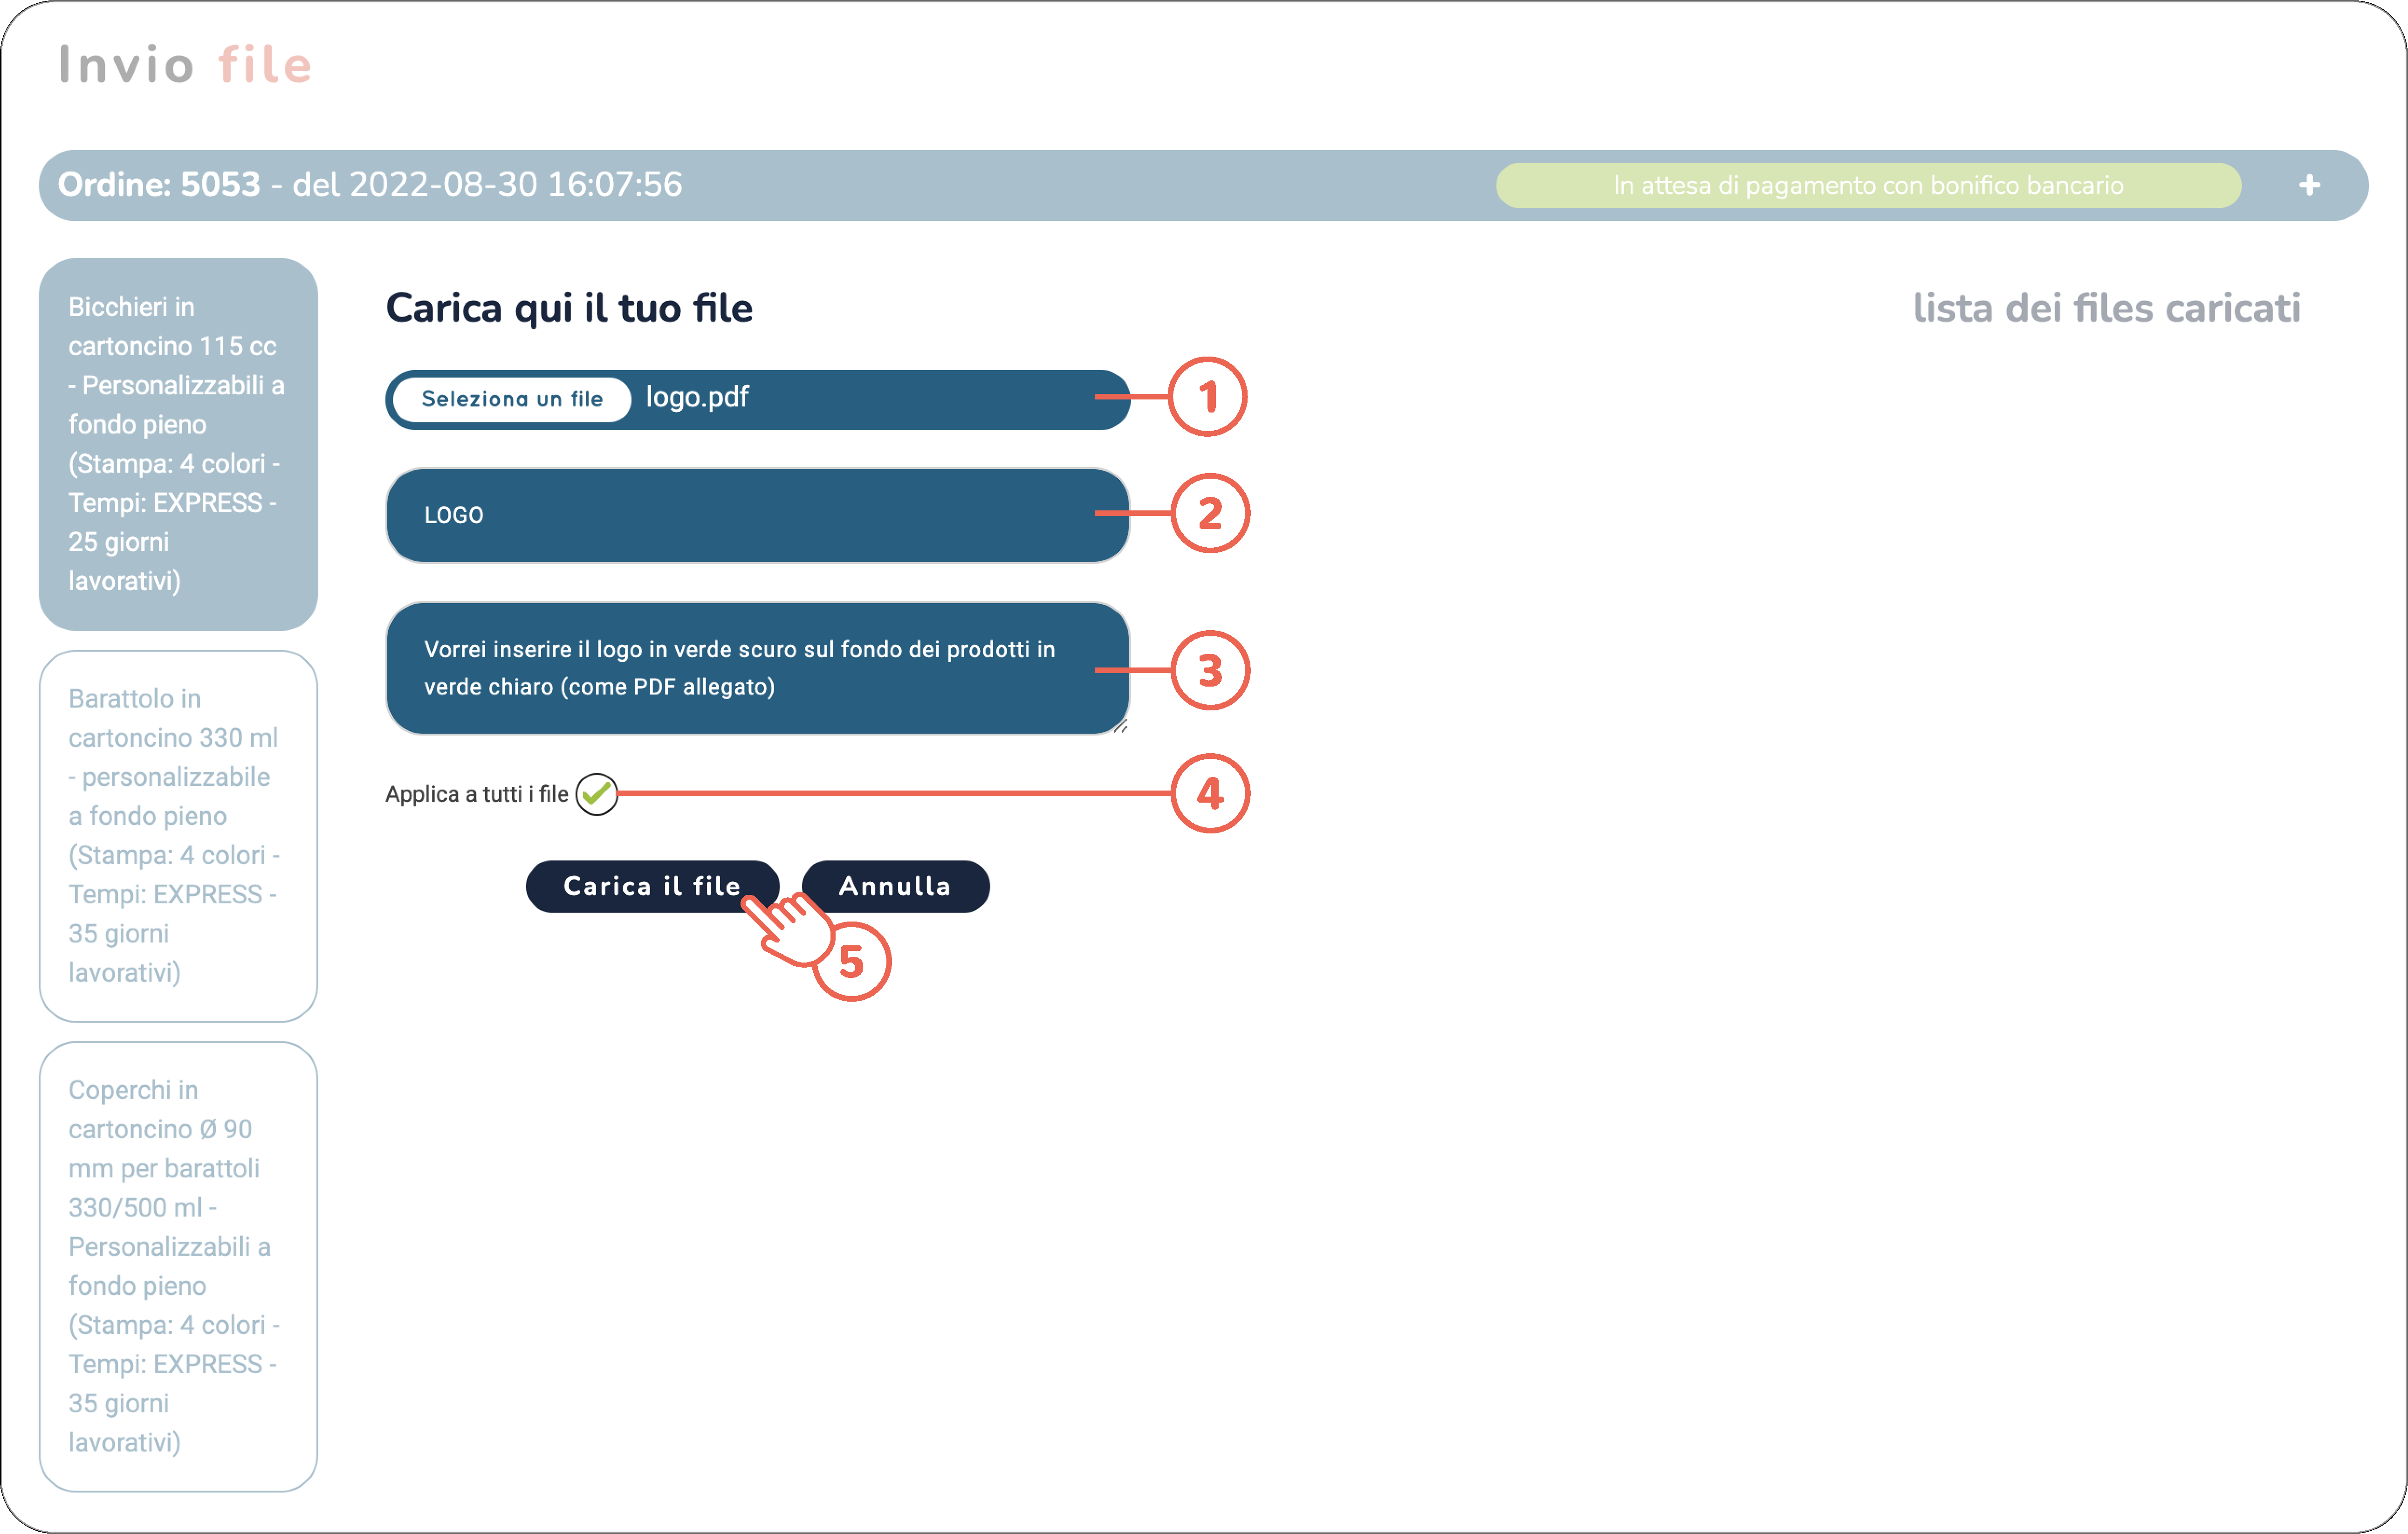
Looking at the image below and proceeding in order you will have to:
1. Select your vector file in a format that is PDF, AI, EPS, SVG
2. Name the file you just uploaded
3. If you deem it necessary, you can add notes
4. If you want the file to be uploaded to all the items in the order, just tick "apply to all files". If, otherwise, you want to enter a different graphic file for each item in the order, you will have to leave the field empty and continue by clicking on the "upload file" button (5).
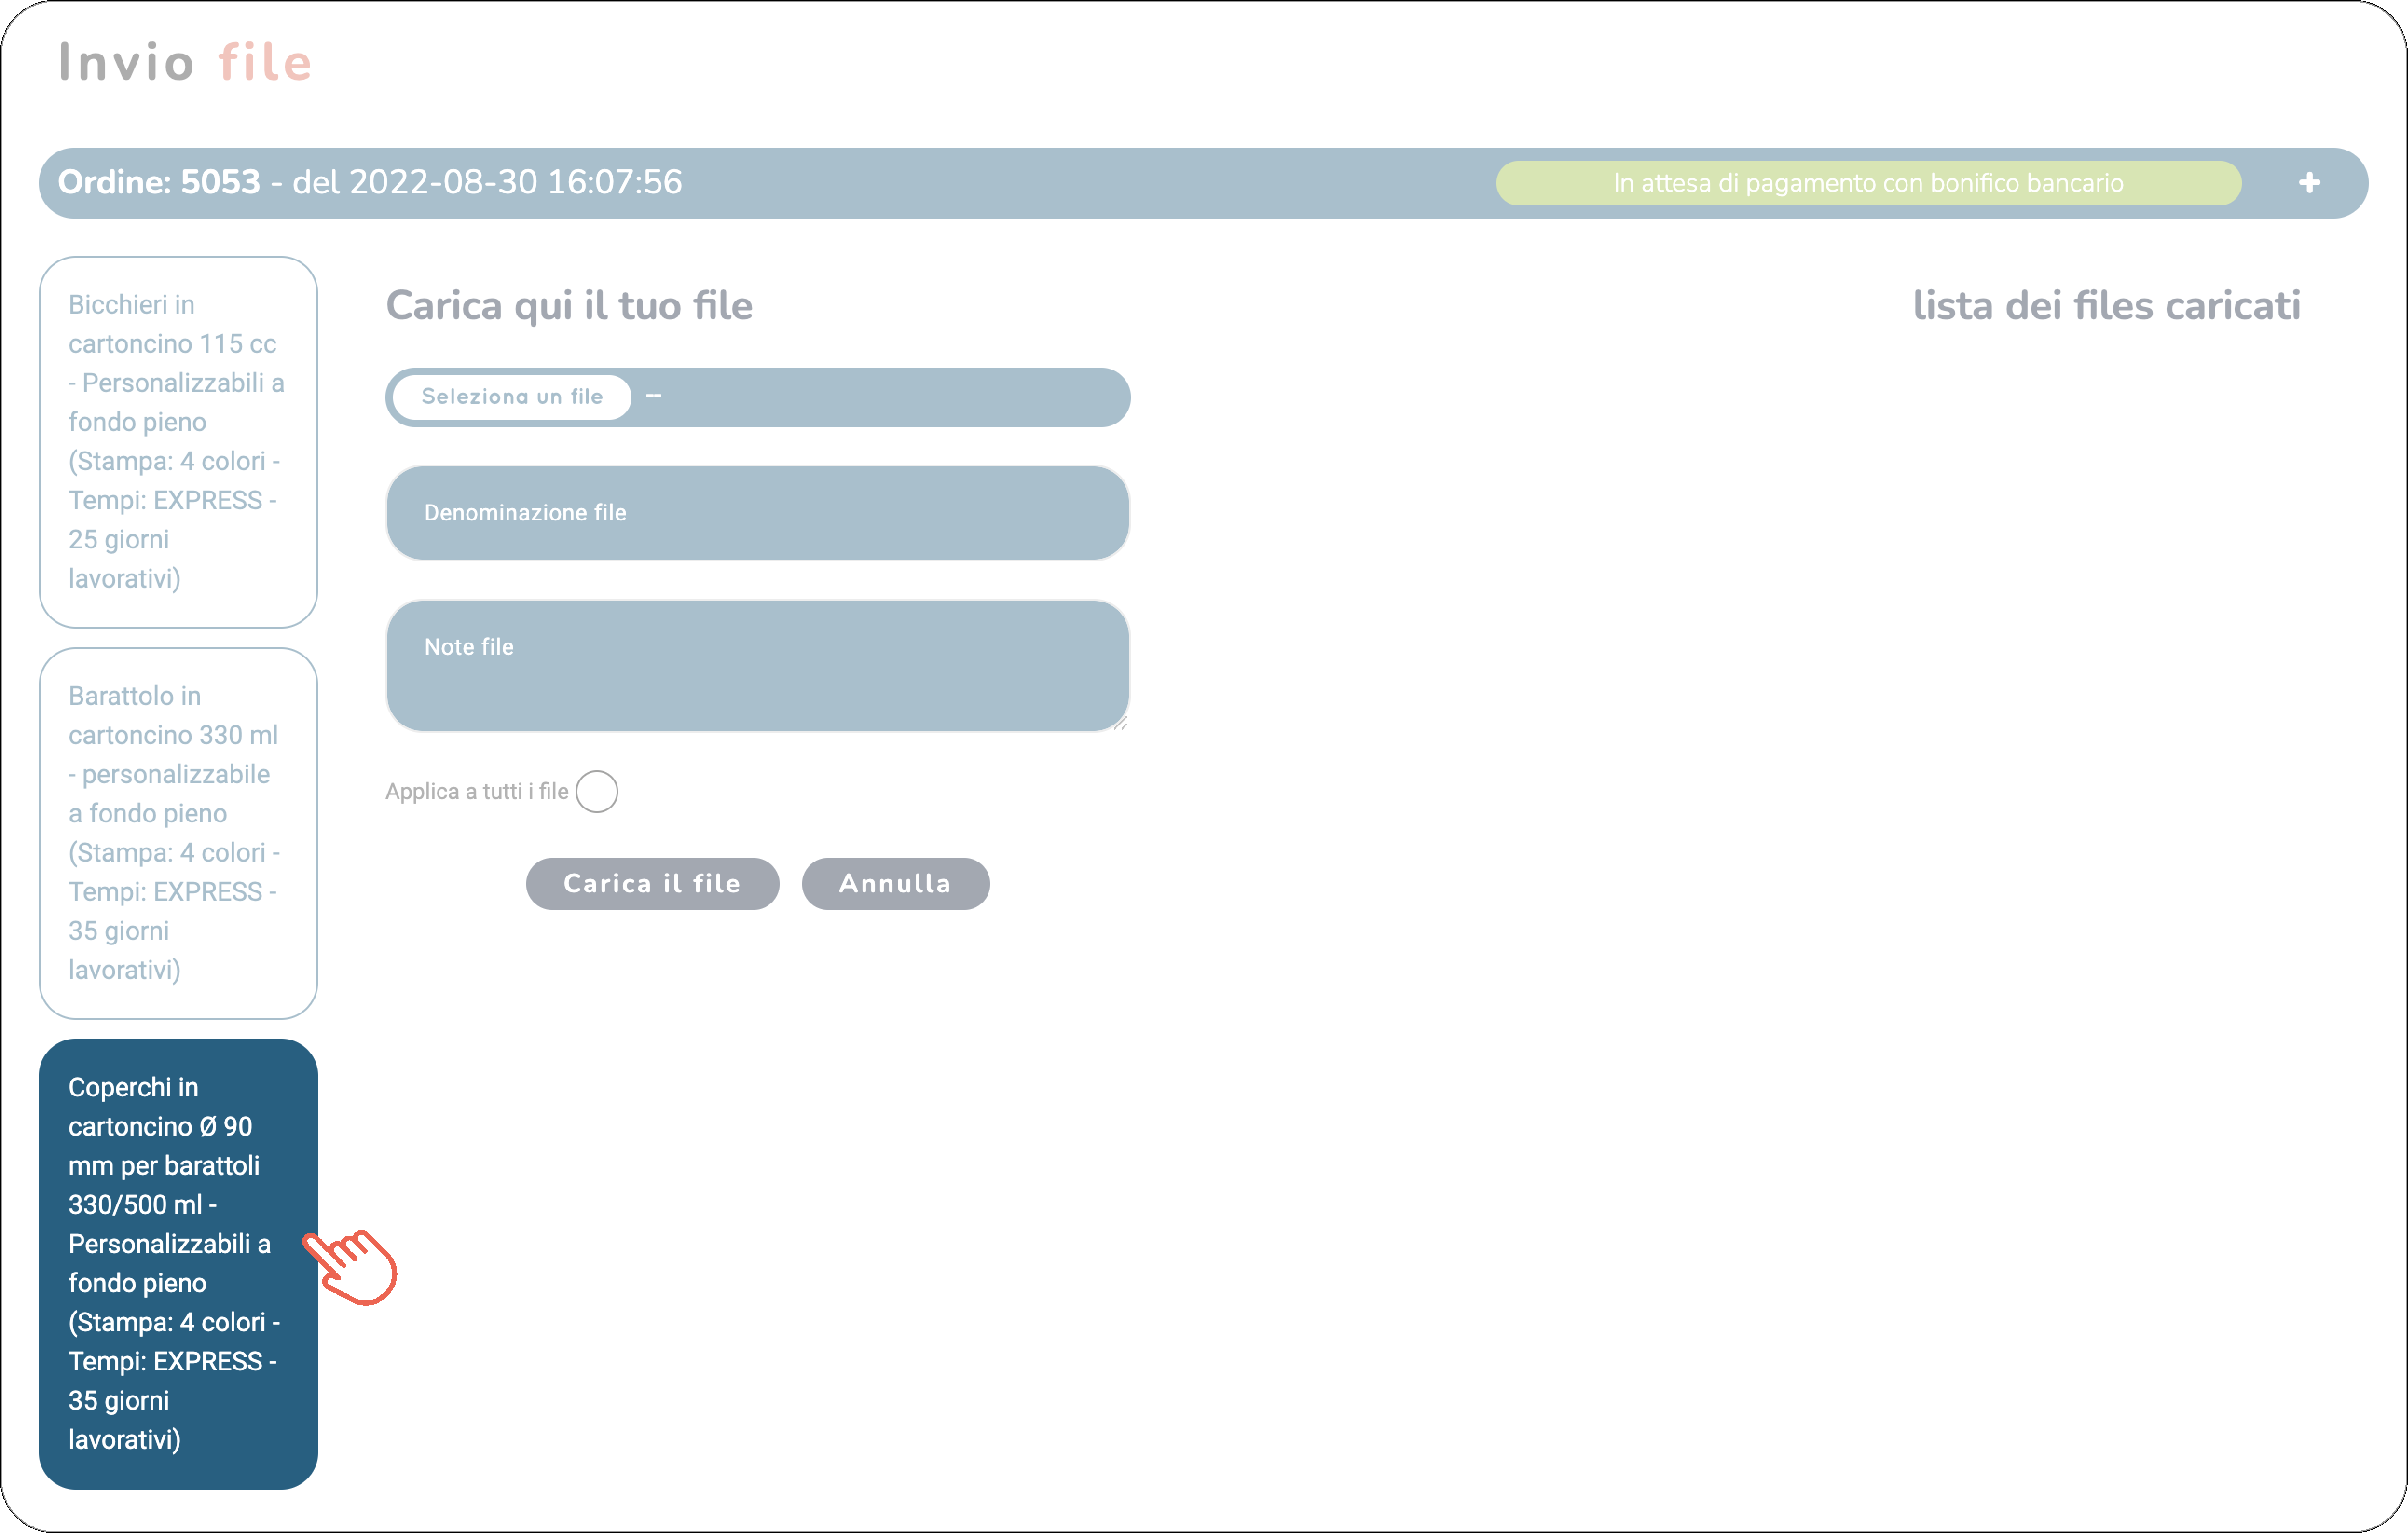
If you have decided to upload a different graphic file for an item in the order, simply select the item from the list and proceed as explained above.
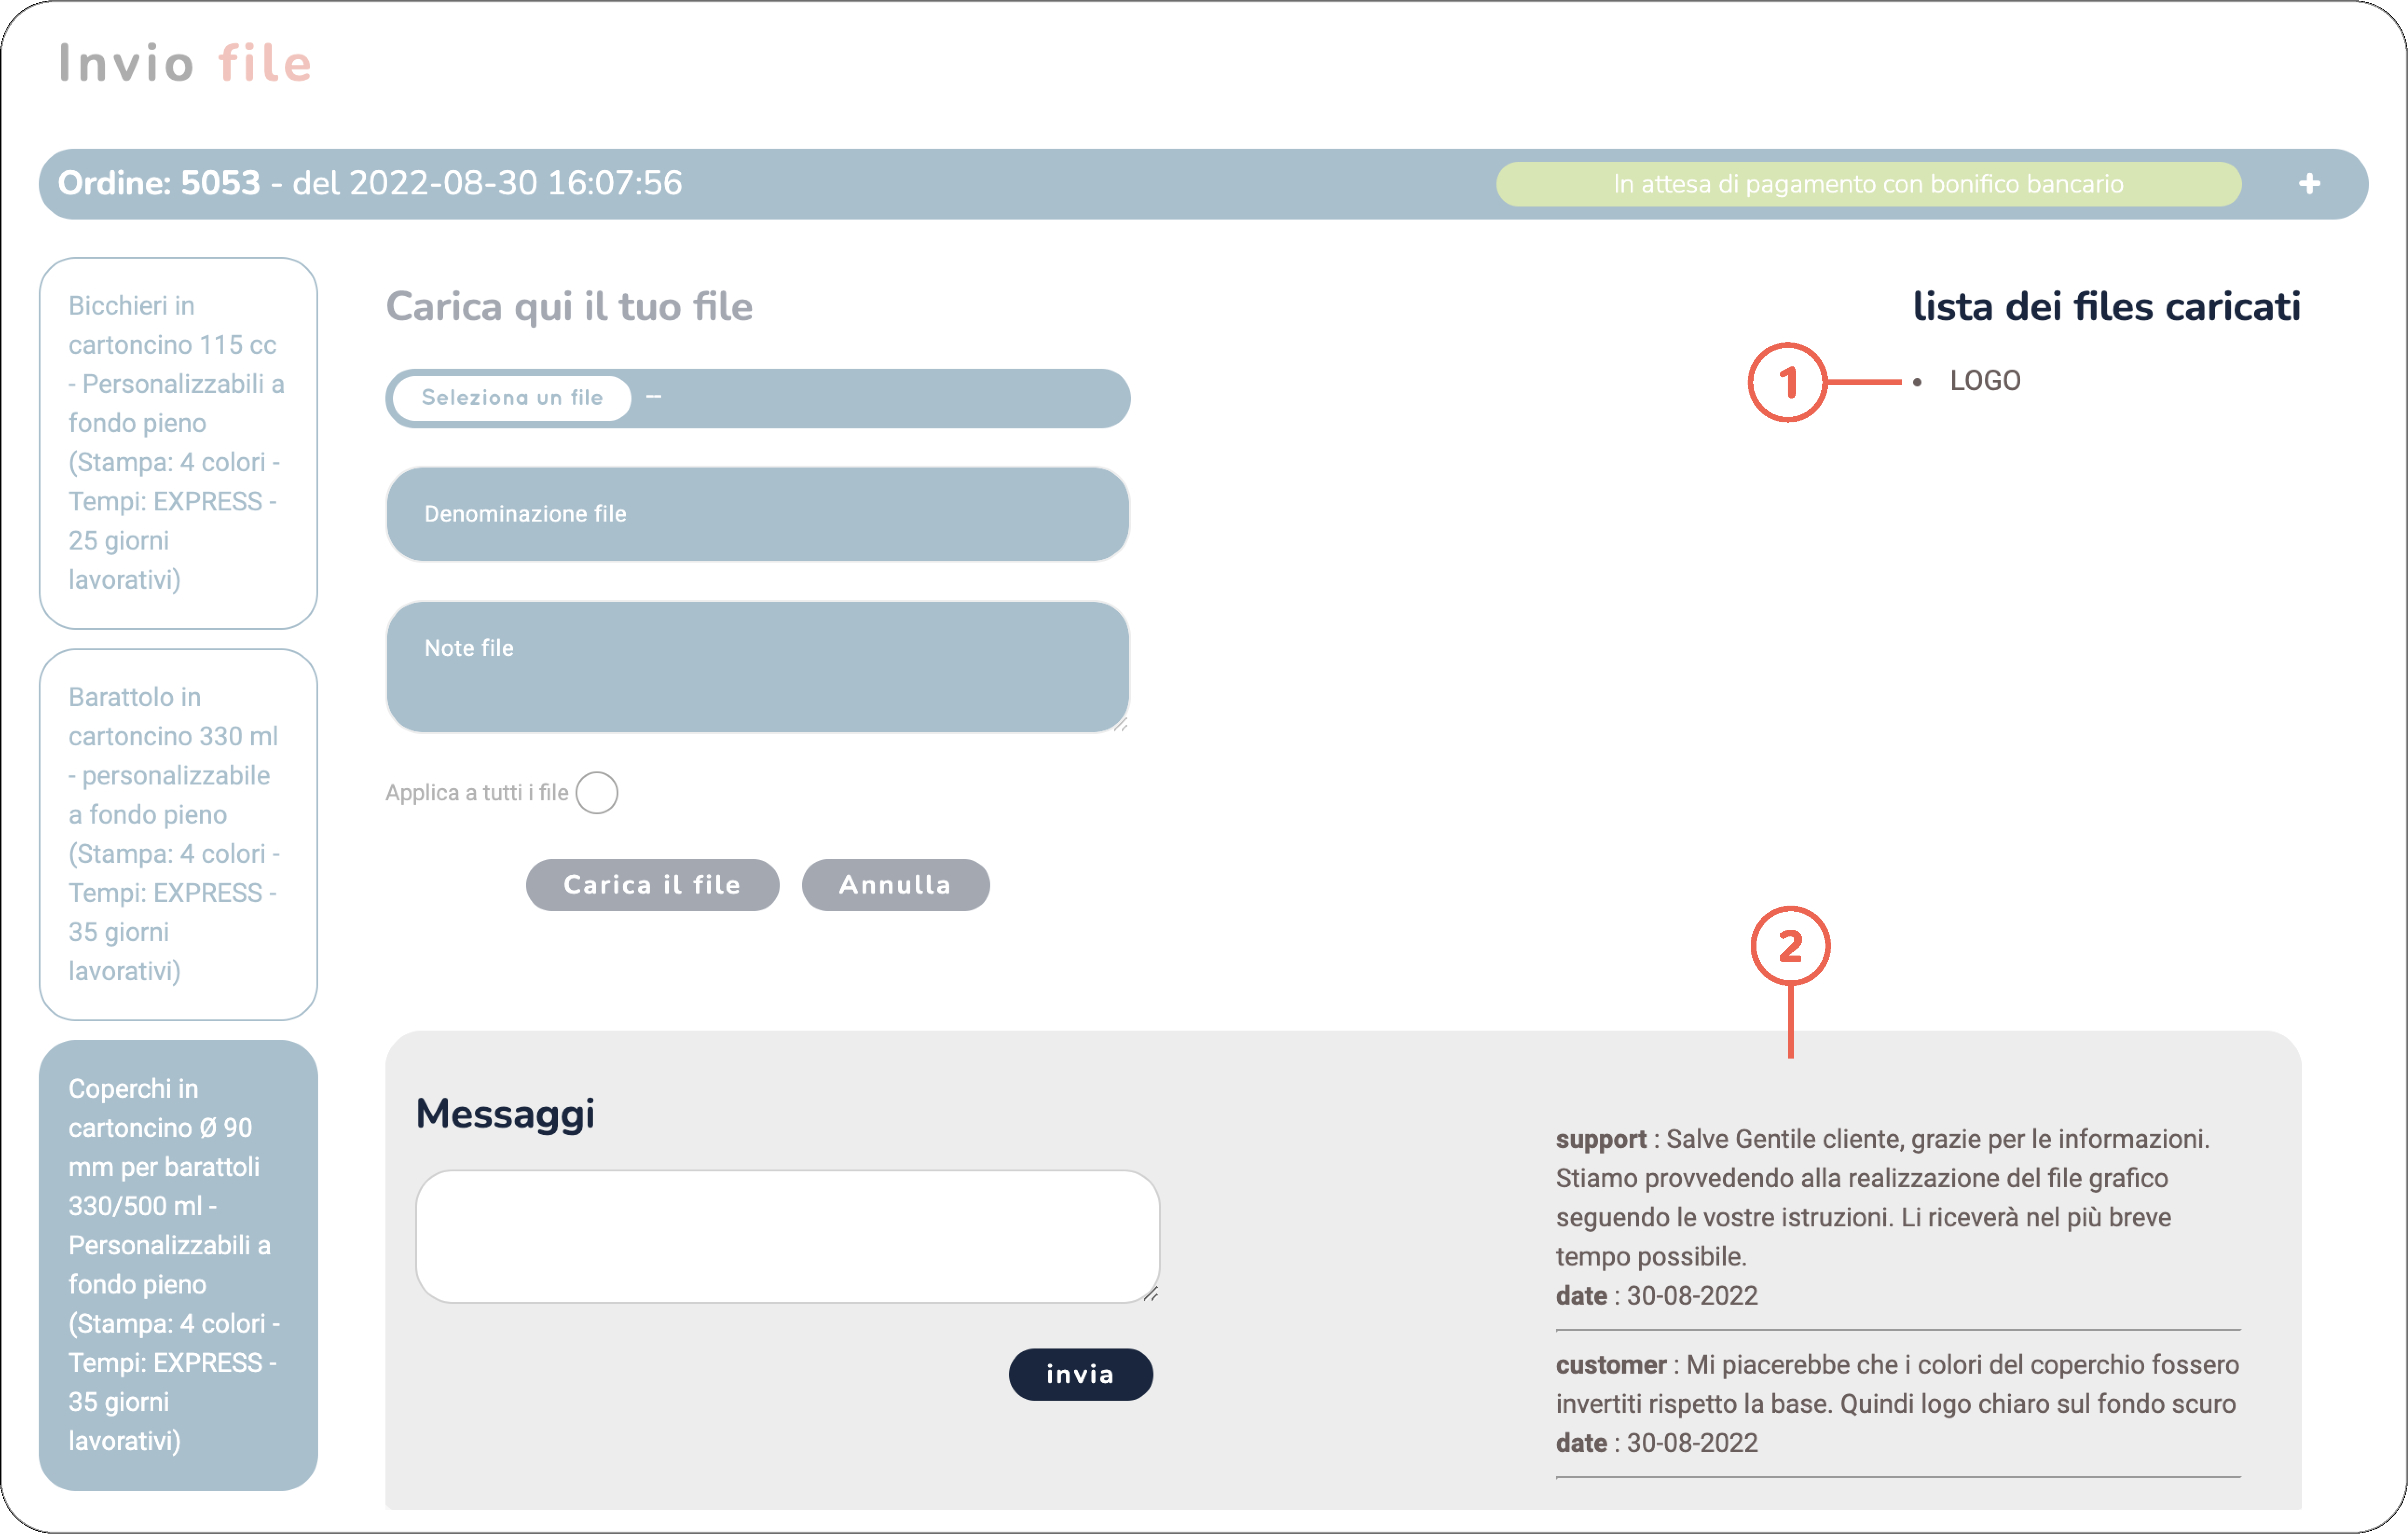
After uploading all the graphic files necessary for a correct continuation of the order, you will notice that on the right (1) the list of files will be enriched under the heading "list of uploaded files", at the bottom instead, a messaging area will open (2) for all communications between you and our designers who will inform you of all the processes that will take place from this moment until the approval of the graphic draft.
Only after accepting our graphic proposal will your items go to print and the delivery time count will begin from that moment.
If you don't know how the draft approval process works, click here.